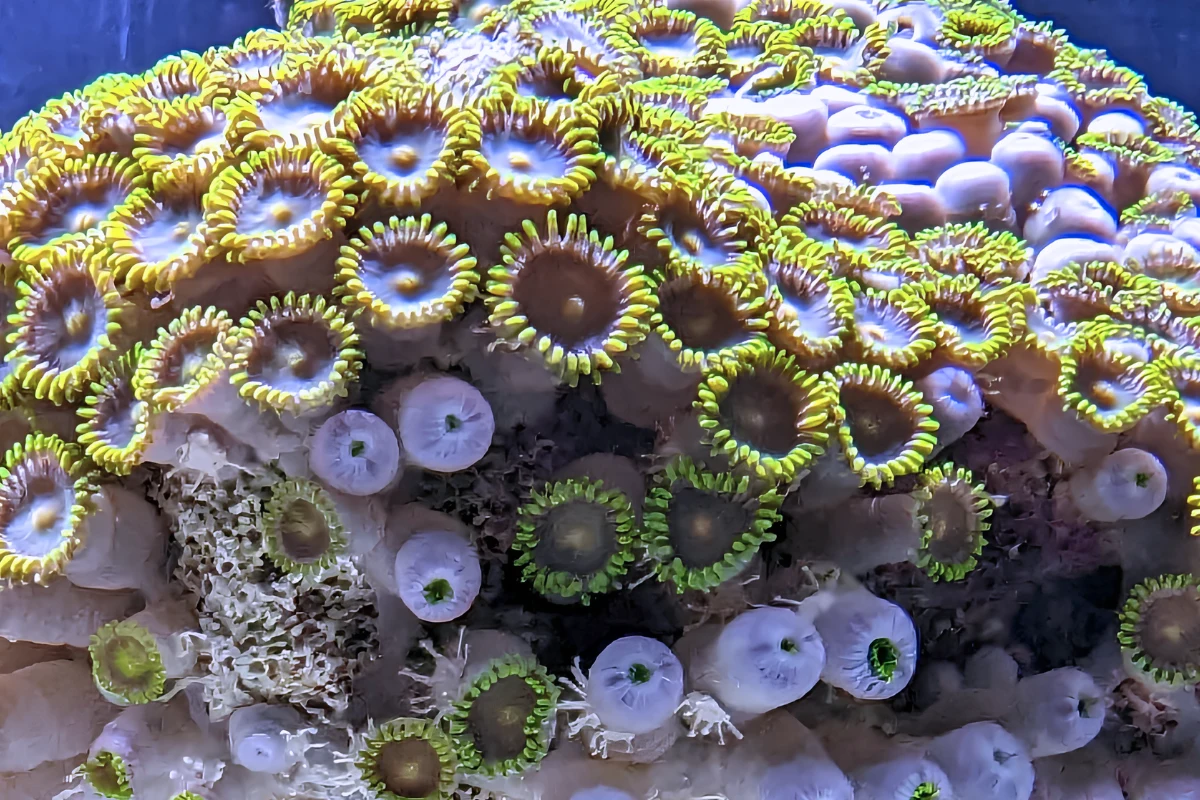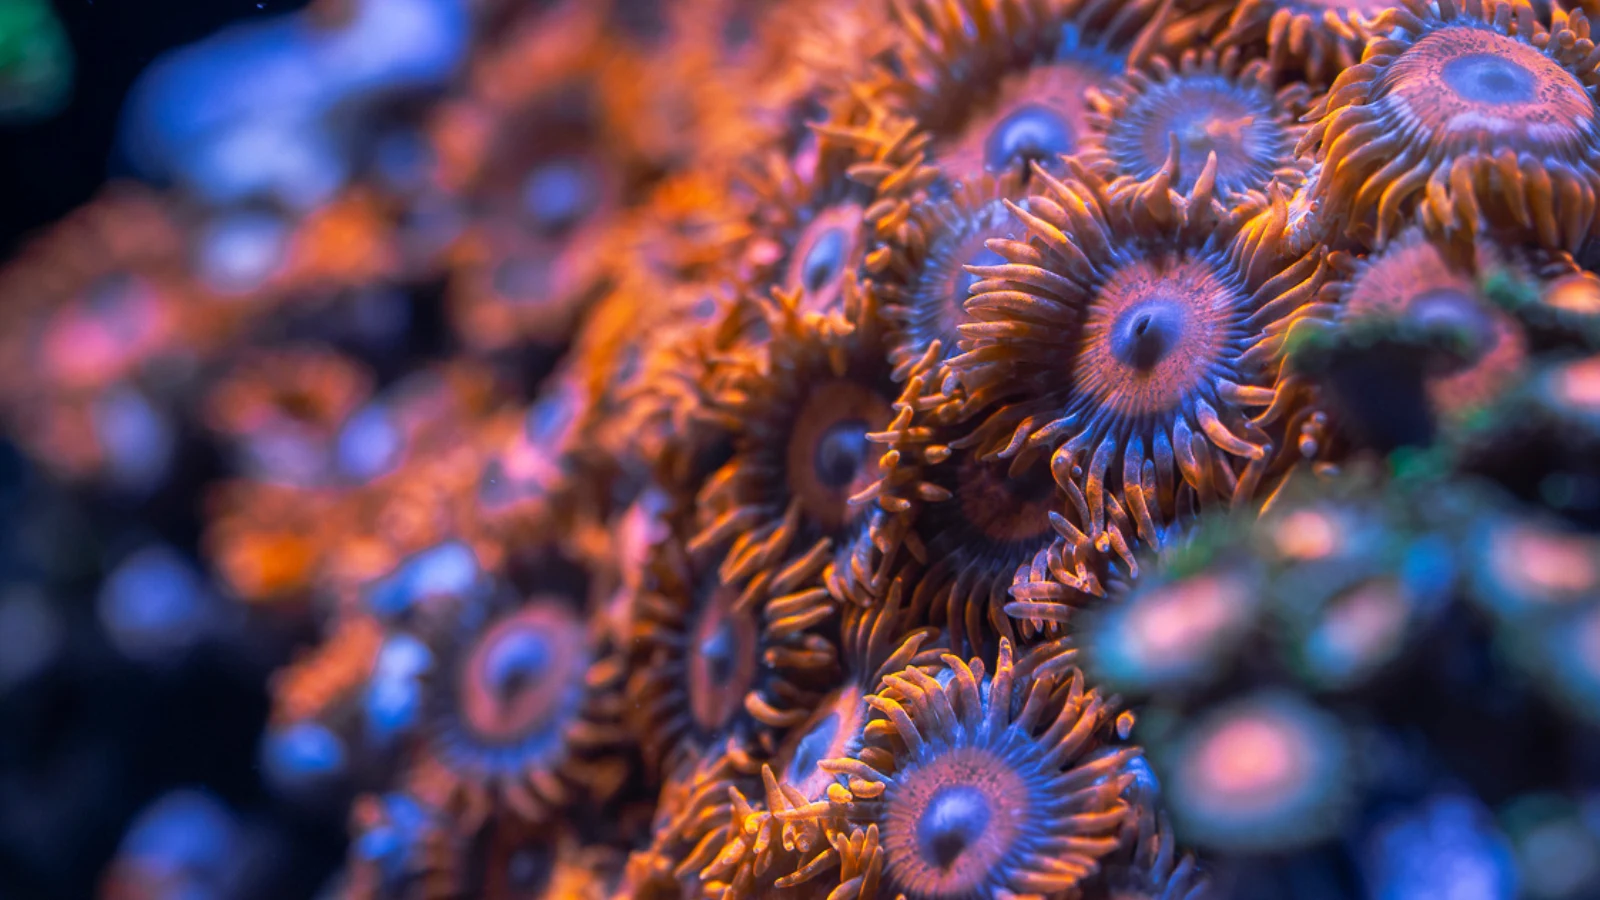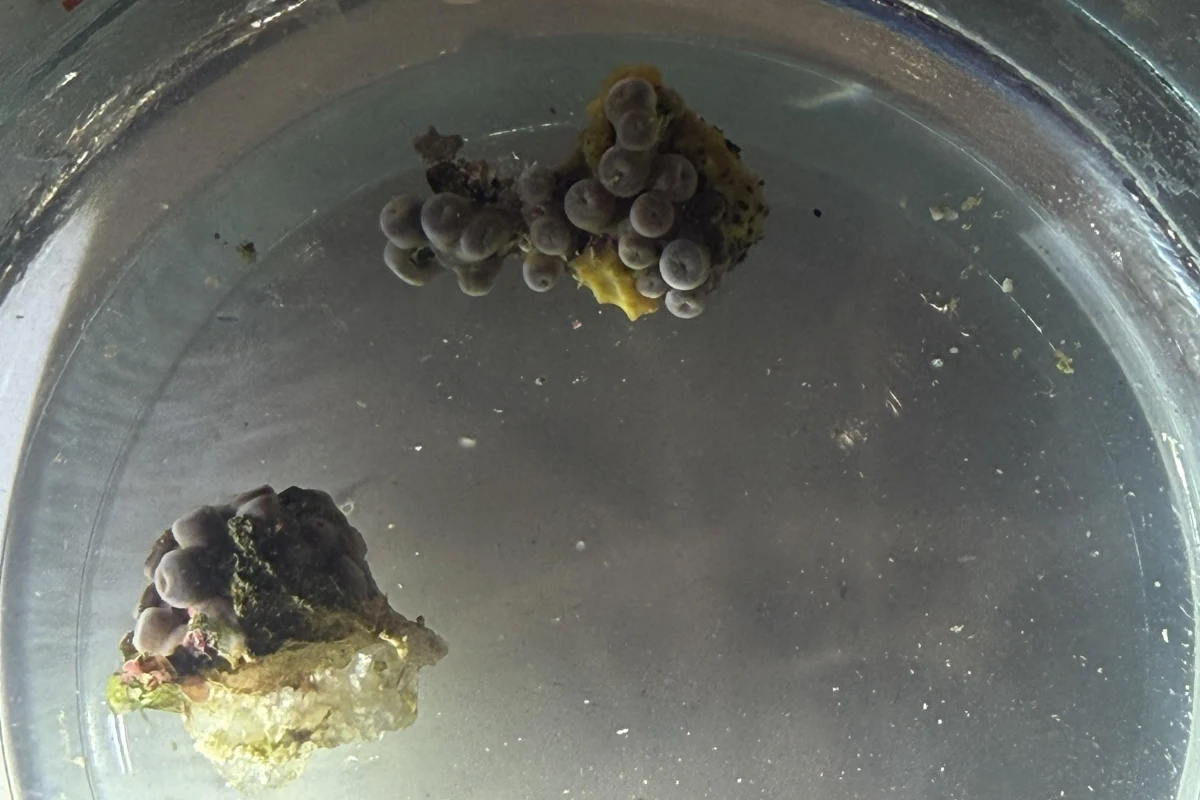
There is nothing quite like bringing home a new zoanthid frag. Whether you've finally found a morph you've been searching for or picked up something unexpected at your local fish shop, the temptation is to get it straight into the display aquarium and see how it looks under your lights.
Before you do, there is one important step worth considering: dipping your new coral.
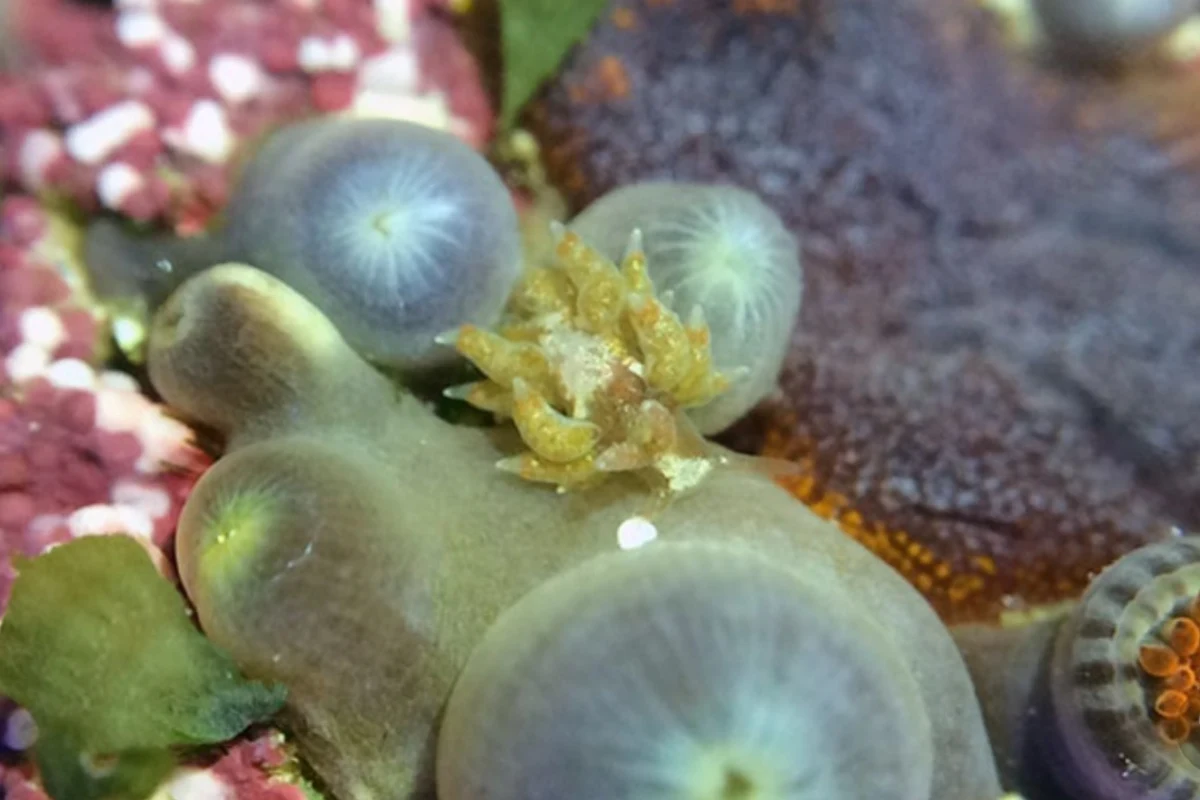
Even healthy-looking zoanthids can arrive with unwanted hitchhikers. Tiny nudibranchs, sea spiders, sundial snails and other organisms can hide between the polyps, underneath frag plugs or around the edges of the colony. Some are harmless, but others can cause serious problems once established in an aquarium.
A coral dip can help remove certain external pests before they have the opportunity to spread. However, dipping is not a guarantee that a coral is completely pest-free, and it does not replace careful inspection or quarantine.
This guide explains how to prepare and dip zoanthids, what to look for during the process and how to give your new colony the best possible start in its new home.
For everyday husbandry, see our Complete Zoanthid Care Guide.
Why Should You Dip New Zoanthids?
Zoanthids are often grown and traded as small colonies attached to frag plugs or pieces of live rock. These surfaces can provide excellent hiding places for small organisms that are difficult to spot during a quick inspection.
Some hitchhikers are completely harmless, while others may feed on coral tissue or reproduce rapidly once introduced to a suitable environment.
A coral dip is designed to help remove certain external pests from the coral before it enters your aquarium.
Depending on the product used, dipping may also help with particular surface infections or tissue problems, although different dips contain different active ingredients and should not be considered interchangeable.
The aim is to reduce the likelihood of introducing unwanted organisms while avoiding unnecessary stress to the coral.
Which Pests Are We Trying to Prevent?
| Pest or hitchhiker | Why it matters |
|---|---|
| Zoa-eating nudibranchs | Can feed on zoanthid tissue and damage colonies |
| Sundial snails | Recognised predators of zoanthids |
| Zoanthid sea spiders | Some species can feed on zoanthids |
| Other unwanted mobile invertebrates | May be present on the frag plug or surrounding rock |
| Nudibranch eggs | Can remain attached after mobile pests have been removed |
| Nuisance algae | Can arrive on frag plugs and eventually grow around the colony |
| Aiptasia | Can hitchhike on plugs and rock, and is not reliably eliminated by ordinary coral dipping |
| Not all these organisms respond to the same dip, and some may survive treatment. This is why inspection and follow-up observation remain essential. |
What Equipment Do You Need to Dip Zoanthids?
You do not need an expensive setup to dip a new zoanthid frag. A few clean containers and some basic equipment are enough to create a practical dipping station.
Prepare everything before taking the coral out of its transport container.
This helps minimise handling time and prevents you from having to search for equipment while the coral is already in the dipping solution.
| Equipment | Purpose |
|---|---|
| Commercial coral dip suitable for zoanthids | Helps remove or treat the pests or conditions specified by the manufacturer |
| Clean dipping container | Holds the prepared treatment solution |
| Separate rinsing container | Holds clean saltwater for rinsing after the dip |
| Aquarium water or freshly mixed saltwater | Used to prepare the dip and rinse, according to the product instructions |
| Measuring syringe or suitable measuring tool | Allows accurate measurement of the dip solution |
| Timer | Ensures the correct treatment duration |
| Magnifying glass | Helps identify small pests and eggs |
| Tweezers | Useful for carefully removing visible pests or debris |
| Small torch | Helps inspect the underside of the frag and spaces between polyps |
| Suitable protective gloves | Reduces direct contact with coral tissue and treatment chemicals |
| Protective eyewear | Helps protect against accidental splashes |
| A small turkey baster or pipette may also be useful if the dipping product recommends gently moving water around the coral. | |
| Avoid forceful jets of water that could damage the zoanthids or create splashes and aerosols. |
Choosing the Right Coral Dip
There are several commercial coral dipping products available to reefkeepers, and they are not all designed to do exactly the same thing.
Some are intended to help remove external invertebrate pests, while others are formulated primarily as antiseptic treatments.
Before buying a coral dip, check that the manufacturer considers it suitable for zoanthids and that it is intended to address the problem you are trying to prevent or treat.
Do not assume that a product designed for one type of coral or pest is automatically appropriate for every zoanthid.
Follow the Manufacturer's Instructions
Different dipping products require different concentrations and exposure times.
The amount of treatment added to the water, how long the coral should remain immersed and whether the solution needs to be circulated will depend on the specific product.
Always follow the instructions supplied with the dip you are using.
Adding more treatment or leaving the coral immersed for longer does not necessarily make the process more effective. It may simply increase the risk of damaging an otherwise healthy frag.
Use a measuring syringe or another suitable measuring tool rather than estimating the dose.
How to Dip Zoanthids: Step-by-Step
The following process provides a general framework for dipping newly acquired zoanthids using a commercial product specifically suitable for them.
The manufacturer's instructions should always take priority over any general guidance regarding concentration, treatment duration and handling.
Step 1: Prepare Your Dipping Area
Choose a clean, stable work surface with good lighting and enough space for your dipping and rinsing containers.
Put on your protective gloves and eyewear before handling the coral.
Prepare the dipping container and a second container containing clean saltwater for rinsing.
The water should be at an appropriate temperature and salinity for the coral. Water taken from your established aquarium is often convenient, provided it is suitable for the product and is not contaminated with medication or other treatments.
If using freshly prepared saltwater, make sure it has been properly mixed and its temperature and salinity are appropriate.
Keep the dipping solution and clean rinsing water completely separate.
Step 2: Inspect the Zoanthid Before Dipping
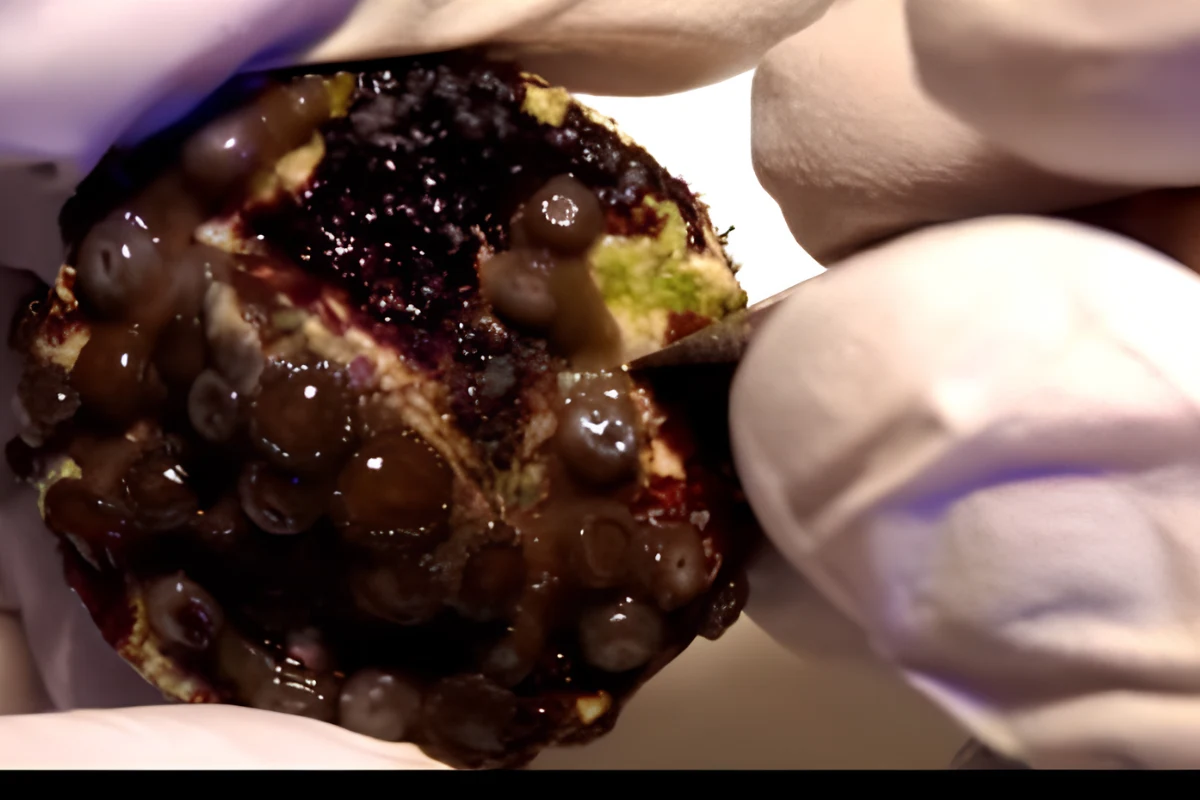
Before placing the frag into the dipping solution, examine it carefully.
Look around the base of the polyps, between the stalks and underneath the frag plug. Pay particular attention to any unfamiliar animals, unusual tissue damage or small clusters that could be pest eggs.
A magnifying glass or macro photograph can be extremely useful.
If you find an unfamiliar organism, photograph it before removing it where practical. Not every hitchhiker is harmful, and a clear photograph may allow you to identify it later.
Things to look for during inspection:
- Small slug-like animals between the polyps
- Spiral or coiled egg masses
- Unusual patterned snails
- Tiny spider-like animals
- Aiptasia growing on the plug
- Nuisance algae around the colony
- Damaged or deteriorating tissue
- Unusual organisms hiding underneath the frag plug
Step 3: Prepare the Coral Dip
Fill your dipping container with the amount of saltwater required for the treatment.
Measure the dipping product according to the manufacturer's instructions and add it to the water as directed.
Mix the solution appropriately before introducing the coral.
Be especially careful with the volume of water being treated. A small container will require a different amount of product from a large container, and guessing the volume can easily lead to an incorrect concentration.
Do not mix different dipping products together unless their manufacturers explicitly instruct you to do so.
Step 4: Place the Zoanthid in the Dip
Carefully place the zoanthid frag into the prepared dipping solution.
Ensure that the coral is immersed as required by the product instructions and begin your timer.
If the manufacturer recommends water movement during treatment, gently circulate the solution or move the frag as directed.
Some products recommend gently directing water around the coral to help dislodge mobile pests. If using a pipette or turkey baster, keep the flow gentle and directed into the water rather than creating forceful splashes.
Watch the coral throughout the process.
If the colony shows an unusual or severe adverse reaction, follow the manufacturer's guidance for stopping treatment and transferring it to clean saltwater.
Step 5: Inspect the Dipping Container
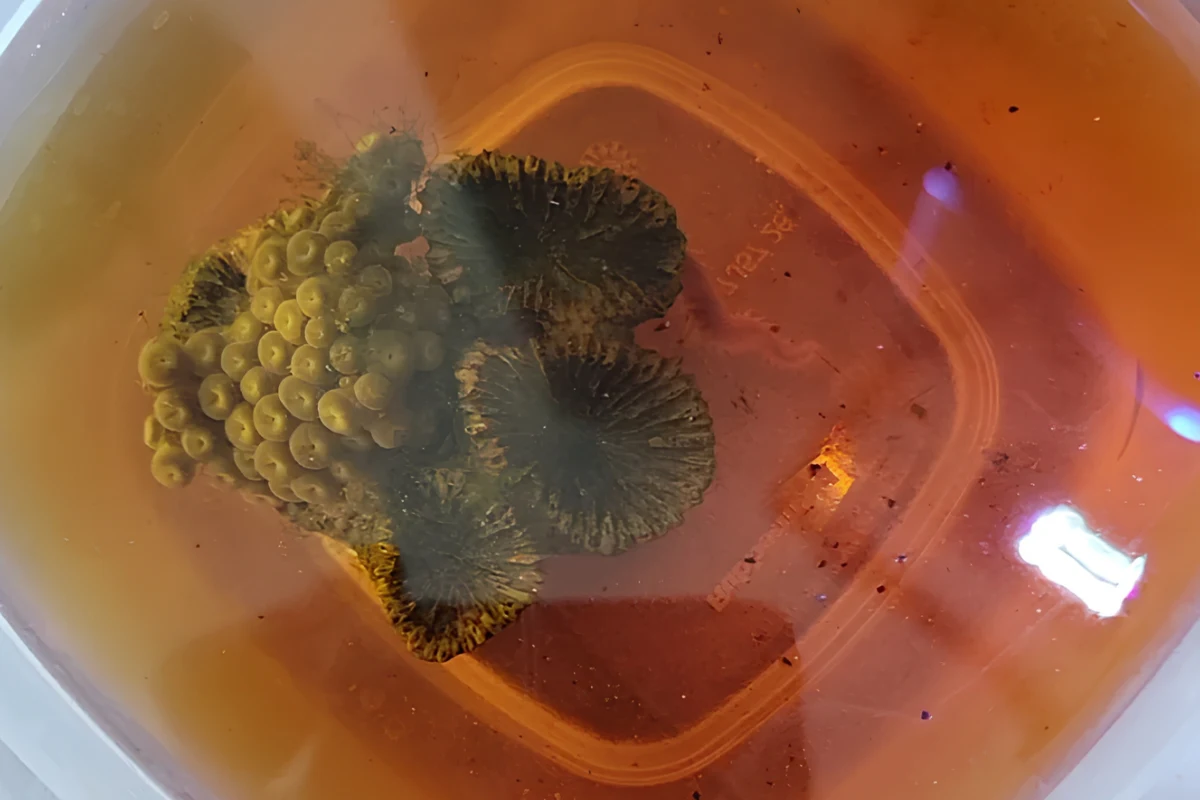
Once the recommended treatment time has finished, examine the water in the dipping container.
Depending on the product and the organisms present, you may find small invertebrates that have become detached from the frag.
Some pests will be easy to recognise, while others may appear as tiny moving dots or unfamiliar shapes.
Use a torch and magnifying glass if necessary.
Finding pests in the dipping container is a useful indication that the treatment has dislodged something, but it does not prove that every pest or egg has been removed.
Likewise, a perfectly clear dipping container does not guarantee that the coral was pest-free.
Step 6: Rinse the Zoanthid
After completing the dip, transfer the coral into your separate container of clean saltwater according to the product instructions.
Gently move the frag through the water if appropriate to help remove residual dipping solution.
The rinsing container should contain clean saltwater that has not been used for the treatment.
Do not pour the dipping solution into your aquarium, and do not reuse the contaminated dipping water.
Once rinsed, the coral can be transferred into a suitable quarantine system or introduced to the display aquarium if that is your chosen approach.
Step 7: Inspect the Frag Again
Before introducing the zoanthid into its new home, take another look at the colony and frag plug.
Check whether any organisms remain attached and look particularly carefully for egg masses.
If you find a suspected pest that was not removed during treatment, identify it before deciding what further action is appropriate.
Do not simply increase the dipping concentration or immediately repeat the treatment without considering the product instructions and the condition of the coral.
Step 8: Introduce the Zoanthid to Its New Home
Once the frag has been inspected, dipped and rinsed, place it into a suitable position in your quarantine aquarium or display tank.
If you are unsure what lighting the coral was previously kept under, start with a conservative position and allow it to adjust gradually.
Provide moderate, indirect water movement and make sure the frag is securely positioned.
Some zoanthids open relatively quickly after introduction, while others may remain closed for a period following transport and handling.
Avoid repeatedly moving the coral simply because it has not opened immediately.
What Coral Dips Cannot Do
Dipping is a useful preventative measure, but it has limitations.
A coral may appear perfectly clean after treatment while still carrying unwanted organisms or eggs.
Some pests hide within the structure of the frag plug or surrounding rock, while others are naturally resistant to particular treatments.
It is important to understand these limitations rather than assuming that a single dip makes a newly acquired coral completely safe to introduce.
| Problem | Can ordinary coral dipping eliminate it? |
|---|---|
| Mobile zoa-eating nudibranchs | Suitable products may remove or kill exposed individuals |
| Nudibranch eggs | Generally cannot be relied upon to eliminate them |
| Sundial snails | Physical identification and removal are important |
| Zoanthid sea spiders | Some products may affect exposed individuals, but effectiveness varies |
| Aiptasia | Not reliably eliminated by routine coral dipping |
| Nuisance algae | Dipping does not guarantee its removal |
| Hidden pests inside frag plugs | May survive if the treatment does not reach them |
| All possible coral diseases | No. Different conditions require different approaches |
Why Nudibranch Eggs Are Such a Problem
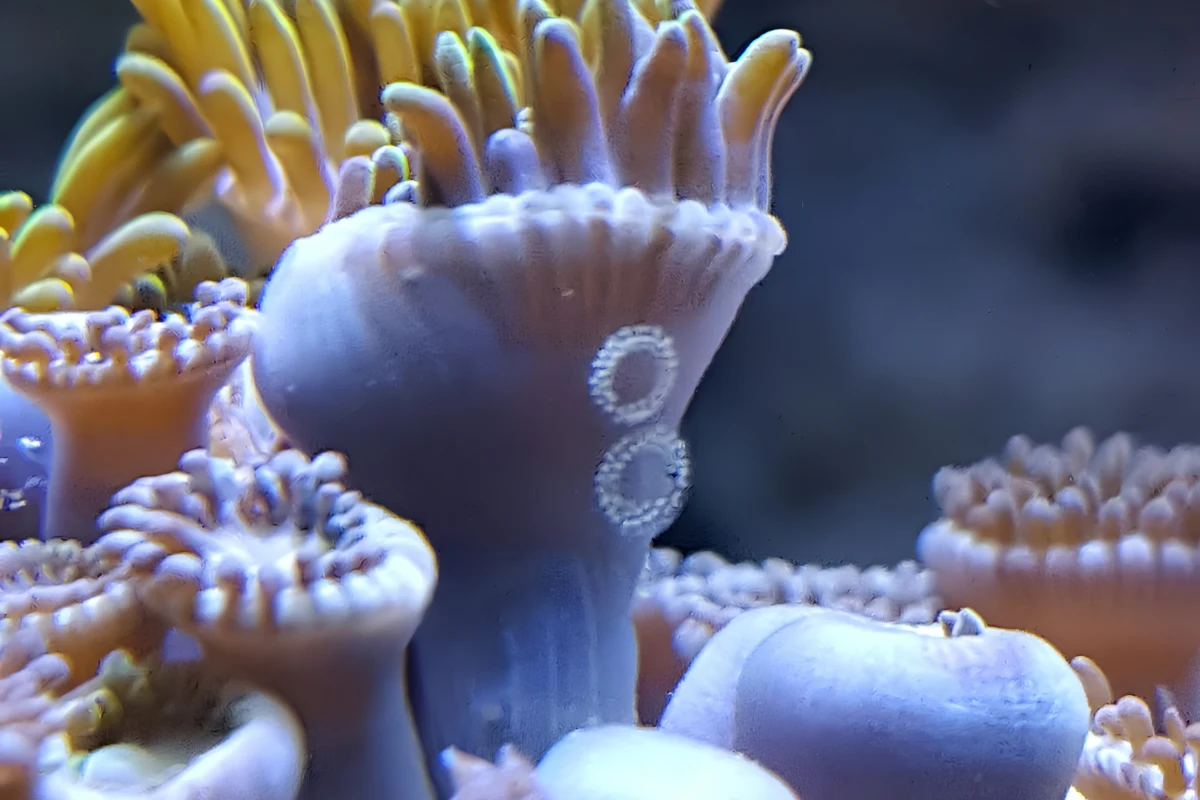
Zoanthid-eating nudibranchs are particularly troublesome because removing the visible adults does not necessarily eliminate the infestation.
Their eggs may remain attached to the colony, frag plug or surrounding surfaces after treatment.
These eggs can be difficult to spot without close inspection.
If they survive and later hatch, another generation of nudibranchs may begin feeding on the zoanthids.
This is why quarantine and follow-up inspection are so valuable. A coral that appeared pest-free immediately after dipping may reveal a problem later.
Should You Remove the Original Frag Plug?
Frag plugs can provide hiding places for unwanted organisms.
Small pests, eggs and nuisance algae may be present underneath the plug or around the point where the coral has attached itself.
Removing the original plug and remounting the coral can sometimes reduce the amount of unwanted material introduced into an aquarium.
However, this should not automatically be done to every new zoanthid.
If the colony has grown firmly across the plug, removing it may damage living tissue and create unnecessary stress.
Consider the condition of the frag, whether suspicious organisms are present and whether the plug can be removed without damaging the colony.
For a small frag attached only by its original mounting material, replacing the plug may be straightforward. A well-established colony covering the entire plug is a different situation.
Should You Quarantine New Zoanthids?
Quarantine provides an additional layer of protection beyond the initial dip.
A separate coral quarantine aquarium allows you to observe new zoanthids before introducing them to your established collection.
This can be particularly useful when the new coral has an uncertain history, comes from a system with known pests or is a large colony containing numerous hiding places.
During quarantine, watch for unusual organisms, egg masses, damaged tissue and repeated polyp closure.
Regular inspection allows you to identify problems that may not have been visible during the initial treatment.
There is no single quarantine duration that guarantees every potential pest has been excluded. A quarantine plan should take account of the organisms of concern, their life cycles and the condition of the coral.
What If You Don't Have a Quarantine Tank?
Not every reefkeeper has the space or equipment for a dedicated coral quarantine aquarium.
If quarantine is not practical, careful inspection and an appropriate dipping routine can still help reduce the risk of introducing pests.
Inspect the coral before and after dipping, paying particular attention to the frag plug and any visible egg masses.
Once the frag is in the display aquarium, continue observing it closely over the following weeks.
It is important to recognise that this approach carries more risk than keeping a new coral isolated for observation.
Should You Dip Zoanthids That Are Already Closed or Stressed?
Not every closed zoanthid needs dipping.
A recently transported frag may remain closed while adjusting to its new environment. A colony may also close because of excessive flow, a sudden lighting change or unstable water conditions.
Dipping an already stressed coral without identifying the underlying problem may introduce further stress without providing any benefit.
If you can see an external pest or have good reason to suspect one, an appropriate dip may be worthwhile.
If there is no evidence of pests, investigate the aquarium conditions and the coral's recent history before deciding how to proceed.
Common Coral Dipping Mistakes
- Using a product that is not suitable for zoanthids
- Guessing the amount of dip instead of measuring it
- Exceeding the recommended treatment time
- Mixing different dipping products
- Using water with unsuitable temperature or salinity
- Failing to inspect the underside of the frag plug
- Assuming a single dip removes nudibranch eggs
- Returning dipping solution to the display aquarium
- Skipping the clean saltwater rinse
- Reusing contaminated dipping water
- Dipping a stressed coral repeatedly without identifying the problem
- Using forceful jets of water that damage polyps or create splashes
- Forgetting to wear protective gloves and eyewear
- Assuming a coral is pest-free simply because no organisms were visible after treatment
A Simple Dipping Checklist
- Prepare your equipment and put on suitable protective gloves and eyewear.
- Prepare separate dipping and rinsing containers.
- Inspect the zoanthid and frag plug.
- Photograph and identify any suspicious organisms.
- Prepare the coral dip according to the manufacturer's instructions.
- Place the frag into the dipping solution.
- Follow the specified treatment time and handling instructions.
- Inspect the dipping water for dislodged pests.
- Transfer the coral into clean saltwater for rinsing.
- Inspect the colony and frag plug again.
- Introduce the zoanthid into quarantine or a suitable position in the display.
- Continue monitoring for pests, eggs and changes in colony health.
Frequently Asked Questions
Do You Need to Dip Every New Zoanthid?
Dipping new zoanthids is a useful preventative measure that many experienced reefkeepers include in their introduction routine.
However, it does not guarantee that every pest or egg has been removed.
Careful inspection and quarantine provide additional protection, particularly when introducing valuable colonies into an established aquarium.
How Long Should You Dip Zoanthids?
The correct dipping time depends on the product being used.
Different commercial coral dips have different formulations and treatment instructions, so there is no universal dipping duration suitable for every product.
Always follow the manufacturer's directions for the specific dip you are using.
Can Coral Dips Kill Zoa-Eating Nudibranchs?
Some commercial coral dips can remove or kill exposed mobile nudibranchs.
However, you should not assume that every product will eliminate every nudibranch or that a successful dip has removed their eggs.
Careful inspection and continued monitoring remain important.
Will a Coral Dip Kill Nudibranch Eggs?
You should not rely on ordinary coral dipping to eliminate nudibranch eggs.
Egg masses may remain attached to the colony or frag plug after the mobile pests have been removed.
Inspect the coral carefully and use an appropriate quarantine and follow-up monitoring routine.
Can You Dip Zoanthids in Freshwater?
Freshwater dipping is sometimes discussed within the reefkeeping hobby, but it is not the same as using a commercial coral dip prepared with saltwater.
A sudden change in salinity can place additional stress on marine animals, and freshwater dipping should not be treated as a universal or risk-free method for removing zoanthid pests.
For a routine introduction process, use a commercial dipping product specifically suitable for zoanthids and follow its instructions.
Can I Put Coral Dip Directly Into My Reef Tank?
No. Coral dipping products intended for use outside the aquarium should be prepared and used in a separate container according to their instructions.
Do not pour the used dipping solution into the display tank or quarantine aquarium.
Rinse the treated coral appropriately before introducing it into its new system.
Should You Dip Zoanthids More Than Once?
Repeat treatment may be appropriate when dealing with a confirmed pest infestation, particularly if eggs have survived the initial dip.
However, the correct approach depends on the pest involved, the dipping product and the condition of the coral.
Do not repeatedly dip a colony on an arbitrary schedule without considering the manufacturer's instructions and whether further treatment is necessary.
Why Are My Zoanthids Closed After Dipping?
Zoanthids may remain closed for a period following handling, transport or dipping.
Provide appropriate water conditions, lighting and flow, and allow the colony time to settle.
If the coral shows progressive tissue damage, rapid deterioration or other concerning symptoms, investigate further rather than assuming that prolonged closure is always normal.
Make Dipping Part of Your Coral Introduction Routine
Bringing home a new zoanthid should be an enjoyable part of reefkeeping, not the beginning of a pest infestation.
A sensible dipping routine can help reduce the risk of introducing unwanted organisms while giving you an opportunity to examine a new colony before it joins the rest of your collection.
Prepare your equipment, inspect the frag carefully and use an appropriate commercial dip according to the manufacturer's instructions.
Remember that treatment is only one part of the process. Hidden pests and eggs can survive, which is why careful inspection, quarantine where practical and continued observation are so important.
Most importantly, treat the coral with care. The aim is to protect both your new zoanthid and the established aquarium it will eventually become part of.
A few extra minutes spent inspecting a new arrival can save a great deal of trouble later.